Friday, July 30, 2010

Wine Cap Mushrooms are Ready

Hi Folks,

Mike has mushrooms available for sale! He has a patch of wine cap mushrooms growing in our lower garden space. A couple of months ago he laid down a layer of hardwood chips, spread the mushroom "stuff" on it and then placed a layer of wet straw on top of that. There are now white thread like mycilium in the layers and the wine caps are growing from that.

He had a small battle with slugs, but seems to have figured that out. There is now a moat of wood ashes around the patch. For the most part the slugs have been deterred.

The Wine Caps will be for sale at the Potsdam Farmer's Market at Deep Root Farm's stand. Deep Root CSA share holders, please let us know if you are interested in purchasing some mushrooms.

Next year, he will have shitake and oyster mushrooms available. They are growing in logs in our woods. The spores need to inoculate the logs and by late summer, next year they will be ready.

Here is some more wine cap info and a recipe:

Stropharia rugosoannulata (Wine Cap)Winecap

Delicious and often enormous, the Wine Cap pops up commonly in the hardwood woodchips used in landscaping mulch around trees and along tended pathways. This mushroom can be identified positively only in the presence of both the young and mature specimens. The buttons are sometimes but not always a Burgundian red wine color on top. When the veil is still closed over the immature gills, there is a coglike star pattern around the stem. In the mature fruiting bodies, the gills change from pink to a dark pinkish grey to grey brown color while the color of the cap lightens to a light brown to beige color. The spore print is purplish black in color.

I recommend eating only the young mushrooms of this species which are firm and bug free. The buttons of this species can reach 5-6” in diameter while still immature. They are meaty and rich and are well paired in meat sauces and sautés. When large, it can be cut into strips, brushed with olive oil, balsamic vinegar, sprinkled with herbs, salt and pepper and grilled to perfection.


Wine caps and cauliflower

Here's a side dish where the mild flavor of cauliflower offsets the stronger influences of the wild mushrooms and Indian seasonings. Wine-cap stropharia mushrooms have enough of a penetrating flavor to withstand the pungent spices.

2 tablespoons peanut oil
2 teaspoons garam masala or curry powder
1 teaspoon black mustard seeds
1 teaspoon cumin seeds
1/2 teaspoon freshly ground black pepper (1/4 teaspoon peppercorns)
1 clove garlic, chopped
1 1/2 pounds cauliflower, broken into florets
2 1/2 cups sliced wine-cap stropharia mushrooms

1. Heat the peanut oil in a large skillet over medium heat. Add the garam masala, black mustard seeds, cumin seeds, and black pepper and cook, stirring constantly, until the mustard seeds pop, 2 to 3 minutes.

  1. Add the remaining ingredients and cook the vegetables, stirring, for another 15 minutes, until the water from the mushrooms has evaporated.


Spiced Wine Caps

8 cups wine cap stropharia mushrooms, sliced
1 tsp. almond oil or canola oil
2 tsp. water mint or other mint species, ground

1/2 tsp. nutmeg, ground
1 tsp. cardamon, ground

1 tsp. anise seeds, ground
1 tsp. salt

2 tbs. wineberry wine or red wine

1. Heat the oil in a frying pan, add the mushrooms, and add the mushrooms, spices, and salt.

2. Cook on medium heat 5 minutes, stirring often.

  1. When the mushrooms release liquid, add the wine and continue cooking another 10 minutes or until all the liquid is absorbed or evaporated, stirring often.


Wine Caps in Wine

12 cups wine cap stropharia mushrooms, sliced
1/2 tbs. olive oil
6 tbs. lemon juice or lime juice
6 tbs. oak leaf wine or white wine
1/2 tbs. nutmeg, ground
1/2 tbs. fennel seeds, ground
1/2 tbs. salt

1. Cook the mushrooms in the olive oil over medium heat 3-5 minutes or until they begin to release liquid.

2. Stir in the remaining ingredients and bring to a boil. Reduce the heat to low, cover, and simmer over low heat 15 minutes.

  1. Uncover and cook over high heat, stirring constantly, until all the liquid is evaporated or absorbed, about 5-10 minutes.


Monday, July 26, 2010

Kale Recipe

Kale


It is a bit early, but the kale is going crazy. Here are some sample recipes to try. Enjoy!

Roasted Kale with Sea Salt from healthycookingsuite101.com

  • 4 cups firmly-packed kale
  • 1 Tbsp. extra virgin olive oil
  • 1 tsp. good-quality sea salt

Preheat oven to 375 degrees F. Wash and trim the kale: Peel off the tough stems by folding the kale leaves in half like a book and stripping the stems off. Toss with extra virgin olive oil. Roast for five minutes. Turn kale over. Roast another 7 to 10 minutes until kale turns brown and becomes paper thin and brittle. Remove from oven and sprinkle with sea salt. Serve immediately.

Makes 2 servings.

Garlicky Greens Recipe from 101 cookbooks.com

If you are using spinach ignore the stem instructions below. With spinach I simply trim any long stems. Also, feel free to make this vegan and/or dairy-free by leaving out the Parmesan cheese. Toasted almonds or pine nuts are a great substitution (or addition).

1 large bunch of kale, chard
2 tablespoons extra-virgin olive oil
fine grain sea salt
5 cloves of garlic, crushed and chopped
1/4 cup Parmesan cheese (opt)
crushed red pepper flakes

To de-stem each leaf of chard/kale, grab the main stalk in one hand and strip the leaf from the stem all the way up with the other. I then tear the big leaves into bite-sized pieces, but you can use a knife for this task if you prefer. Wash the greens in a big bowl (or sink) full of clean water, rinsing and swishing to rinse away any stubborn grit and dirt. Drain, rinse again, and set aside.

Hold off cooking the greens until just before eating. Then, in a large skillet heat the olive oil. Add a couple big pinches of salt and the greens. They should hiss and spit a bit when they hit the pan. Stir continuously until their color gets bright green, and they just barely start to collapse - two, three, maybe four minutes, depending on how hot your pan is and how much structure your greens have. Then, just thirty seconds before you anticipate pulling the skillet off of the heat, stir in the garlic. Saute a bit, remove the pan from the heat, stir in the Parmesan, and add a big pinch of crushed red pepper flakes. Taste, add a bit of salt if needed, and serve immediately if not sooner.


Thursday, July 15, 2010


Cuke Dude visits Bonno Road


This is what farmers, who live off-grid, do for entertainment


Monday, July 12, 2010

Week Five and Counting

270 Bonno Road
Hi Folks,

Hard to believe another week has flown by. We just finished picking for the Tuesday boxes. You will find a fennel this week, as well as other veggies that you have not seen yet this season. Yes, I am including some links to recipes. You can use the bulb as well as the green feathery part (Ian actually likes the leaves the best and often comes down from the gardens with a frond in his mouth.)

Fantastic Fennel

By: Krista Winjum

The Whole Shebang

One of the few plants where the roots, stalk, seeds, fronds and pollen are all used, fennel adds a new flavor twist to meals.

What’s That Flavor?

That unusual flavor in your meal could be fennel. Originating in the Mediterranean, then carried north from Italy by monks, it’s used in nearly every cuisine, flavoring dishes from Indian curries to French stews.

The Raw and the Cooked

The flavor of the bulb is more pronounced when used raw, and is refreshing in salads with citrus. Thick slices grill or bake beautifully, with the heat creating a more subtle and complex flavor.

Take It from the Top

Fennel fronds can substitute for dill, and the seeds are used for meat and baked goods or in spice mixes including Herbes de Provence, Chinese five spice powder and Indian curry powder.


Thursday, July 8, 2010

Homestead Pictures


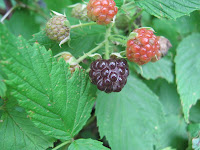
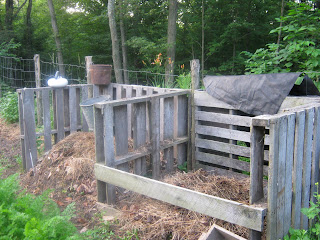
Our off grid homestead consists of 37, mostly forested, acres on the end of Bonno Road, a dirt road in Pierrepont, NY. We have several gardens cultivated in between the forested areas. Our family uses sustainable practices to produce our veggies. Compost is a main ingredient in our soil. The blackberries are growing wild throughout the woods. We will harvest those and bring them to farmers market, when they are ready. MacKenzie and Ian love the sugar snap peas!

Here is a collard recipe as promised, from RecipeZaar.com:

Ingredients

  • 3 cups collard greens
  • 2 tablespoons pine nuts
  • 3 garlic cloves, peeled and chopped (or 1 1/2 tsp minced garlic from a jar)
  • 1 tablespoon olive oil
  • 3 tablespoons raisins
  • 2 tablespoons balsamic vinegar

Directions

  1. 1
    Use a sharp knife to cut out the central rib and stem from each collard leaf. Rinse the leaves in a sink of cool water, lifting them into a colander to drain a bit (you want some water to remain on the leaves).
  2. 2
    Toast the pine nuts over medium heat in a dry skillet for about 5 minutes or until golden.
  3. 3
    Shake the pan often to keep the pine nuts from burning. Transfer to a plate, and set aside.
  4. 4
    Place the garlic and oil in a large skillet, and saute over medium heat for 1 minute or until the garlic is fragrant.
  5. 5
    Add the damp collards and stir, then cover the pan and cook for 2 minutes longer.
  6. 6
    Add the raisins and pine nuts, and stir. Cover and cook for 2 minutes.
  7. 7
    Stir in the balsamic vinegar, cover, and continue to cook for 1 to 2 minutes longer.